2021.4.14 작성
참고 - https://wooooooak.github.io/android/2020/12/04/android-testing/
#0 ViewModel Test
- LiveDataTestUtil
기본적으로 ViewModel은 LiveData를 포함하고 있는 경우가 대부분입니다.
LiveData에 들어가 있는 데이터 값을 확인하고 테스트를 하려면 해당 유틸을 사용을 합니다.
- AndroidJUnit4::class
AndroidJUnit4는 test runner다. 즉 테스트를 실행하는 주체다. junit은 이런 runner가 없이는 테스트가 실행되지 않으며, runner를 따로 지정해주지 않으면 기본 제공하는 runner로 실행된다. @RunWith를 사용하여 Runner를 교체할 수 있다.
- Rule
JUnit에는 JUnit Rule이라는 것이 있다. 테스트를 작성하다보면 여러 테스트 클래스에서 테스트 사전 작업, 직후 작업이 동일할 때가 있다. 즉 코루틴을 사용하는 대부분의 테스트 클래스에서는 @Before에서 Main Dispatcher를 바꾸고, @After에서 되돌려 놓는다. 이런 작업을 하나의 Rule로 만들어 놓으면 @Before, @After마다 자동으로 수행되어 보일러 플레이트 코드를 줄일 수 있다. @get:Rule annotation을 붙여 사용한다.
프로젝트에 코루틴을 사용한다면 MainCoroutineRule 클래스를 만들어 사용한다.
@ExperimentalCoroutinesApi
class MainCoroutineRule(
    val testDispatcher: TestCoroutineDispatcher = TestCoroutineDispatcher()
) : TestWatcher() {

    override fun starting(description: Description?) {
        super.starting(description)
        Dispatchers.setMain(testDispatcher)
    }

    override fun finished(description: Description?) {
        super.finished(description)
        Dispatchers.resetMain()
        testDispatcher.cleanupTestCoroutines()
    }
} - FakeRepository 만들기
실제 데이터베이스는 UUID를 Key값으로 가지고 있는 Task 테이블이다.
ViewModel 테스트를 위해 데이터베이스처럼 데이터를 보관하고 ViewModel의 요청에 따라 반환하는 FakeRepository를 만들어보자.
Unit test이기 때문에 test 디렉토리 안에 FakeTaskRepository 클래스를 생성한다.
Map<String, Task>의 자료구조를 사용해서 데이터를 보관하도록 구현한다. 데이터베이스처럼 Persistence는 없지만 테스트를 진행하는 동안 데이터를 홀드하기에는 충분하다.
FakeRepository는 기존 Repository를 상속받아 Test 코드 내에서만 사용을 한다.
class FakeDataSource : TasksDataSource {

} - InstantTaskExecutorRule
InstantTaskExecutorRule : 모든 Architecture Components-related background 작업을 백그라운드에서가 아닌 동일한 Thread에서 돌게하여 동기적인 처리가 가능하도록 해준다.
// Executes each task synchronously using Architecture Components.
@get:Rule
var instantExecutorRule = InstantTaskExecutorRule()

// Set the main coroutines dispatcher for unit testing.
@ExperimentalCoroutinesApi
@get:Rule
var mainCoroutineRule = MainCoroutineRule()

private lateinit var dataSource: FakeDataSource

@Before
fun setUpViewModel() {
    stopKoin()
    dataSource = FakeDataSource()
    viewModel = ExampleViewModel(dataSource)
}
참고 - https://wooooooak.github.io/android/2020/12/04/android-testing/
#0 ViewModel Test
- LiveDataTestUtil
기본적으로 ViewModel은 LiveData를 포함하고 있는 경우가 대부분입니다.
LiveData에 들어가 있는 데이터 값을 확인하고 테스트를 하려면 해당 유틸을 사용을 합니다.
- AndroidJUnit4::class
AndroidJUnit4는 test runner다. 즉 테스트를 실행하는 주체다. junit은 이런 runner가 없이는 테스트가 실행되지 않으며, runner를 따로 지정해주지 않으면 기본 제공하는 runner로 실행된다. @RunWith를 사용하여 Runner를 교체할 수 있다.
- Rule
JUnit에는 JUnit Rule이라는 것이 있다. 테스트를 작성하다보면 여러 테스트 클래스에서 테스트 사전 작업, 직후 작업이 동일할 때가 있다. 즉 코루틴을 사용하는 대부분의 테스트 클래스에서는 @Before에서 Main Dispatcher를 바꾸고, @After에서 되돌려 놓는다. 이런 작업을 하나의 Rule로 만들어 놓으면 @Before, @After마다 자동으로 수행되어 보일러 플레이트 코드를 줄일 수 있다. @get:Rule annotation을 붙여 사용한다.
프로젝트에 코루틴을 사용한다면 MainCoroutineRule 클래스를 만들어 사용한다.
@ExperimentalCoroutinesApi
class MainCoroutineRule(
    val testDispatcher: TestCoroutineDispatcher = TestCoroutineDispatcher()
) : TestWatcher() {

    override fun starting(description: Description?) {
        super.starting(description)
        Dispatchers.setMain(testDispatcher)
    }

    override fun finished(description: Description?) {
        super.finished(description)
        Dispatchers.resetMain()
        testDispatcher.cleanupTestCoroutines()
    }
}
- FakeRepository 만들기
실제 데이터베이스는 UUID를 Key값으로 가지고 있는 Task 테이블이다.
ViewModel 테스트를 위해 데이터베이스처럼 데이터를 보관하고 ViewModel의 요청에 따라 반환하는 FakeRepository를 만들어보자.
Unit test이기 때문에 test 디렉토리 안에 FakeTaskRepository 클래스를 생성한다.
Map<String, Task>의 자료구조를 사용해서 데이터를 보관하도록 구현한다. 데이터베이스처럼 Persistence는 없지만 테스트를 진행하는 동안 데이터를 홀드하기에는 충분하다.
FakeRepository는 기존 Repository를 상속받아 Test 코드 내에서만 사용을 한다.
class FakeDataSource : TasksDataSource {

}
- InstantTaskExecutorRule
InstantTaskExecutorRule : 모든 Architecture Components-related background 작업을 백그라운드에서가 아닌 동일한 Thread에서 돌게하여 동기적인 처리가 가능하도록 해준다.
// Executes each task synchronously using Architecture Components.
@get:Rule
var instantExecutorRule = InstantTaskExecutorRule()

// Set the main coroutines dispatcher for unit testing.
@ExperimentalCoroutinesApi
@get:Rule
var mainCoroutineRule = MainCoroutineRule()

private lateinit var dataSource: FakeDataSource

@Before
fun setUpViewModel() {
    stopKoin()
    dataSource = FakeDataSource()
    viewModel = ExampleViewModel(dataSource)
}
#1 Room Test
먼저 Room의 구성요소인 데이터베이스 DAO를 테스트해보려합니다.
- build.gradle 코드 추가
androidTestImplementation "androidx.arch.core:core-testing:$archTestingVersion"- TaskDaoTest 클래스 추가하기
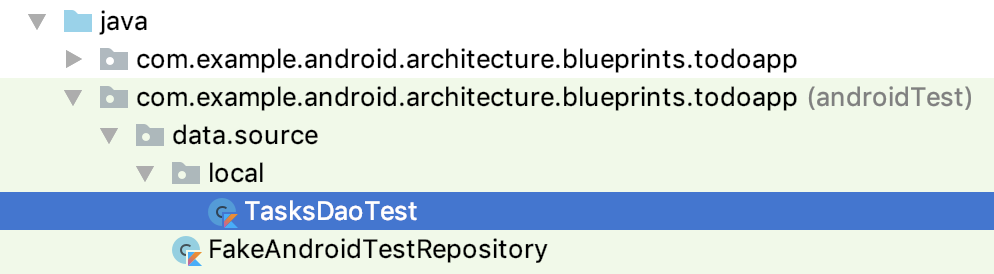
프로젝트에서 androidTest -> data -> source로 이동후, local이란 패키지를 하나 생성합니다.
이에 따라, local 패키지에서 TaskDaoTest.kt를 생성합니다.
- TaskDaoTest 클래스 Set
아래의 예제와 맞게 before와 after를 잘 구분 시켜 코드를 작성합니다.
@ExperimentalCoroutinesApi
@RunWith(AndroidJUnit4::class)
@SmallTest
class TasksDaoTest {

    // Executes each task synchronously using Architecture Components.
    @get:Rule
    var instantExecutorRule = InstantTaskExecutorRule()


    private lateinit var database: ToDoDatabase

    @Before
    fun initDb() {
        // Using an in-memory database so that the information stored here disappears when the
        // process is killed.
        database = Room.inMemoryDatabaseBuilder(
            getApplicationContext(),
            ToDoDatabase::class.java
        ).allowMainThreadQueries().build()
    }

    @After
    fun closeDb() = database.close()

}- DAO Test 메서드 작성
이제 DAO에 따른 Test 메서드를 작성하면 됩니다.
앞서 Set할때의 만들어 놓은 데이터베이스에 값을 넣거나, 빼거나, 수정할 때의 오류가 발생을 하는지 테스트하는 코드입니다.
아래 예제는 id에 따른 값을 넣는 테스트 코드입니다.
@Test
fun insertTaskAndGetById() = runBlockingTest {
    // GIVEN - Insert a task.
    val task = Task("title", "description")
    database.taskDao().insertTask(task)

    // WHEN - Get the task by id from the database.
    val loaded = database.taskDao().getTaskById(task.id)

    // THEN - The loaded data contains the expected values.
    assertThat<Task>(loaded as Task, notNullValue())
    assertThat(loaded.id, `is`(task.id))
    assertThat(loaded.title, `is`(task.title))
    assertThat(loaded.description, `is`(task.description))
    assertThat(loaded.isCompleted, `is`(task.isCompleted))
}
이때 필요한 import 값들 또한 아래에 있습니다.
import androidx.arch.core.executor.testing.InstantTaskExecutorRule
import androidx.room.Room
import androidx.test.core.app.ApplicationProvider.getApplicationContext
import androidx.test.ext.junit.runners.AndroidJUnit4
import androidx.test.filters.SmallTest
import com.example.android.architecture.blueprints.todoapp.data.Task
import kotlinx.coroutines.ExperimentalCoroutinesApi
import kotlinx.coroutines.test.runBlockingTest
import org.hamcrest.CoreMatchers.`is`
import org.hamcrest.CoreMatchers.notNullValue
import org.hamcrest.MatcherAssert.assertThat
import org.junit.After
import org.junit.Before
import org.junit.Rule
import org.junit.Test
import org.junit.runner.RunWith
앞의 예제는 end_codelab_3 레포에 있으니 참고하면 됩니다.
#2 유휴 리소스
유휴 리소스는 결과가 UI 테스트의 후속 작업에 영향을 미치는 비동기 작업을 나타냅니다. 유휴 리소스를 등록하면 앱을 테스트할 때 이러한 비동기 작업을 더욱 안정적으로 검증할 수 있습니다.
- Espresso 유휴 리소스
object EspressoIdlingResource {

    private const val RESOURCE = "GLOBAL"

    @JvmField
    val countingIdlingResource = CountingIdlingResource(RESOURCE)

    fun increment() {
        countingIdlingResource.increment()
    }

    fun decrement() {
        if (!countingIdlingResource.isIdleNow) {
            countingIdlingResource.decrement()
        }
    }

    inline fun <T> wrapEspressoIdlingResource(function: () -> T): T {
        // Espresso does not work well with coroutines yet. See
        // https://github.com/Kotlin/kotlinx.coroutines/issues/982
        EspressoIdlingResource.increment() // Set app as busy.
        return try {
            function()
        } finally {
            EspressoIdlingResource.decrement() // Set app as idle.
        }
    }
}
해당 내용은 Android testing with Espresso’s Idling Resources and testing fidelity에서 더 자세히 볼 수 있습니다.
- Databinding 유휴 리소스
데이터 바인딩 또한 유휴 리소스를 적용시킬 수 있습니다.
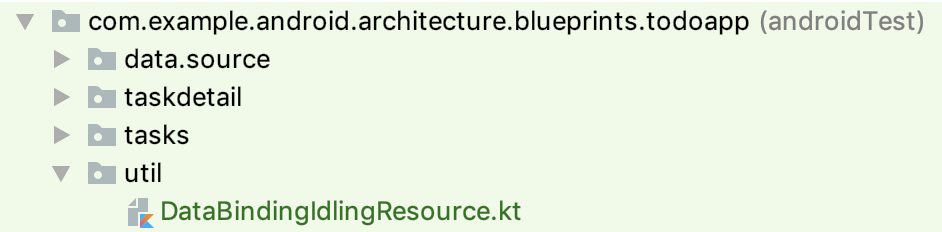
먼저 아래의 경로에서 DataBindingIdlingResource.kt를 생성합니다.
아래는 DataBindingIdlingResource 제공 코드입니다. 해당 코드를 이용해 유휴 리소스를 적용시키면 됩니다.
class DataBindingIdlingResource : IdlingResource {
    // List of registered callbacks
    private val idlingCallbacks = mutableListOf<IdlingResource.ResourceCallback>()
    // Give it a unique id to work around an Espresso bug where you cannot register/unregister
    // an idling resource with the same name.
    private val id = UUID.randomUUID().toString()
    // Holds whether isIdle was called and the result was false. We track this to avoid calling
    // onTransitionToIdle callbacks if Espresso never thought we were idle in the first place.
    private var wasNotIdle = false

    lateinit var activity: FragmentActivity

    override fun getName() = "DataBinding $id"

    override fun isIdleNow(): Boolean {
        val idle = !getBindings().any { it.hasPendingBindings() }
        @Suppress("LiftReturnOrAssignment")
        if (idle) {
            if (wasNotIdle) {
                // Notify observers to avoid Espresso race detector.
                idlingCallbacks.forEach { it.onTransitionToIdle() }
            }
            wasNotIdle = false
        } else {
            wasNotIdle = true
            // Check next frame.
            activity.findViewById<View>(android.R.id.content).postDelayed({
                isIdleNow
            }, 16)
        }
        return idle
    }

    override fun registerIdleTransitionCallback(callback: IdlingResource.ResourceCallback) {
        idlingCallbacks.add(callback)
    }

    /**
     * Find all binding classes in all currently available fragments.
     */
    private fun getBindings(): List<ViewDataBinding> {
        val fragments = (activity as? FragmentActivity)
            ?.supportFragmentManager
            ?.fragments

        val bindings =
            fragments?.mapNotNull {
                it.view?.getBinding()
            } ?: emptyList()
        val childrenBindings = fragments?.flatMap { it.childFragmentManager.fragments }
            ?.mapNotNull { it.view?.getBinding() } ?: emptyList()

        return bindings + childrenBindings
    }
}

private fun View.getBinding(): ViewDataBinding? = DataBindingUtil.getBinding(this)

/**
 * Sets the activity from an [ActivityScenario] to be used from [DataBindingIdlingResource].
 */
fun DataBindingIdlingResource.monitorActivity(
    activityScenario: ActivityScenario<out FragmentActivity>
) {
    activityScenario.onActivity {
        this.activity = it
    }
}

/**
 * Sets the fragment from a [FragmentScenario] to be used from [DataBindingIdlingResource].
 */
fun DataBindingIdlingResource.monitorFragment(fragmentScenario: FragmentScenario<out Fragment>) {
    fragmentScenario.onFragment {
        this.activity = it.requireActivity()
    }
}'IT > Android (안드로이드)' 카테고리의 다른 글
| Android MLKit OCR (Barcode) (0) | 2025.04.21 |
|---|---|
| Android N.4-6 Implementing Login on Android with FirebaseUI (0) | 2025.04.21 |
| Android N.4-4 Testing: Intro to Test Doubles & Dependency Injection (0) | 2025.04.21 |
| Android N.4-3 Testing: Basics (0) | 2025.04.21 |
| Android N.4-2 Virtual Treasure Hunt with Geofences (0) | 2025.04.21 |